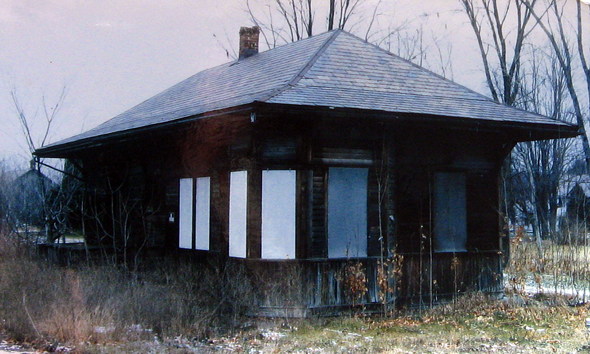
Friday, 28 September 2012

Antique boxes and crates


Basketville - Putney, Vermont

On my way home from WRJ Glory Days I followed route 5 as far as Putney, Vt. before getting on the freeway. I decided to stop at Basketville to pick up something to take home for my wife (brownie points). Basketville is a neat store if you like baskets. On the second floor I found the rafter full of neat old boxes that would make nice signs. One could possibly reduced the size to add on crates or whatever on a layout. Since I always carry a pocket camera when travelling here are a few of the views I took...George Dutka


Wednesday, 26 September 2012

Barn across the tracks.

This barn is located just north of Windsor, Vermont on Route #5 along the old Central Vermont Ry.
A barn along the Central Vermont Railway
Windsor, Vermont

In my last post one could see a barn partly hidden behind a sign in the title photo. It is a structure that makes a great backdrop for a prototype photo. It also could make a great background scene for ones New England layout...what else can be said...enjoy...George Dutka


Monday, 24 September 2012

A yard full of barn parts


A yard full of barn parts can be found just north of Windsor, Vt. along the old Central Vermont Ry. In the background just beyond the tracks is an interesting looking barn that would make a great model. We will take a closer look at it later on.

Leftovers Again?
- an idea for those extra barn parts -

This fall on my way home from Glory Days I followed the old Central Vermont Ry tracks south from White River Jct. Just before I arrived in Windsor, Vermont I saw a barn salvage yard across the road from the tracks. It was kind of a neat scene. I took some time to look around and snap a few photos. One can also view a barn scene across the road that would make a great model...now if only a train came along I could also have a great photo.

A couple of the cupolas found around the yard can be seen here.

This parts yard scene could make an interesting addition to a layout and a great way to use up all those extra little details. What you do not see in the photos and can also be added are the old barn doors leaning against the side of the barn, windows that have been saved and piles of slate shingles. It was kind of neat to get up close and inspect the roof details that I have admired for years from down below...George Dutka

A variety of details can be found there.

Thursday, 20 September 2012

Waterbury, Vermont Inspirations

My White River Packaging has many of the frontal features found in a structure across the tracks from the the Waterbury Vt. station. Features such as three level with centre doors, wooden clapboard white siding. The tall and narrow dimensions reflect the feel of the Waterbury structure .
 Similarities and Inspirations
Waterbury, Vermont

While looking at Marty McGuirk's Central Vermont Railway blog I noticed in the header similarities of the old feed warehouse found across from the Waterbury, Vt. station to my White River Packaging. At least in the front elevation. I have always loved the scene at Waterbury including the trio of station, freight. house and feed warehouse. The Railway Design Associates kit I built features three levels, centre doors or windows on each level and wooden white siding similar to the structure in Waterbury. The tall, long and narrow look reflects what you find in many New England buildings. I guess that is why I was excited to purchased the RDA kit to begin with...George Dutka.

Note the similarities of the structure to the left of the CV train to my White River Packaging.

Sunday, 16 September 2012

Johnson's Loft and Boat Works kit - Part 2

The day is long over and the night shift is hard at work getting the packages ready for the next day. I decided to add some lighting to this building since I had a good amount of interior details to show off.
 White River Packaging
Completing the Railway Design Associate kit as a warehouse

The summer is over and I did accomplish some modelling on those hot and humid summer days.  The beginning of this project can be found in my June 23, 2012 post. Most of the basic construction is covered there. Here the painting and detailing finishes the warehouse project.

The Johnson's Loft and Boat Works has become my White River Packaging a warehouse to be used on my layout extension. The finished structure has been mounted on GatorBoard and has interior lighting to accent my interior details and figures. I added a length of HOn30 narrow gauge track to the scene with a flat car waiting to be loaded. I found standard gauge rails and boxcars just dwarfs the building. In my layout scene there will be standard gauge trackage running near the other side of the building giving the impression it could be loaded from either side although no loading doors are found on the rear.

Once all the walls were secured with additional bracing added to the interior I gave all the walls, cupola, windows and doors a coat of Floquil reefer white. I should mention the cupola did not go together as the instructions mention. Although they are laser cut wood, they are a very poor fit. I did a lot of sanding and cutting to get the basic shape. I then added additional trim to dress it up and hide the gaps. I added a finial to the peak. The cupola roof also looked rough so I used leftover copper roofing from my NorthEastern Scale Models barn kit. The copper roofing got a dusting of Floquil grimy black and jade. I only added some light chalk weathering to the walls and cupola at this point.
A truck has backs up to the loading dock were it will be loaded with local deliveries.


An overhead view of my completed diorama. A short length of narrow gauge rail is used to bring in shipments as required.
The stone base below the walls got brush painted with washes of Floquil pine stain, thinned Floquil black over  a coat of Floquil gray primer. I then used some chalks to highlight some of the stones and the bolts and rods under the loading doors.

The roof needed two triangular supports to hold things together. It was painted Floquil Lark Dk. Gray #132 followed by a coat of Floquil dust while the gray was still wet. I used a heavy dose of chalk and Bragdon weathering to finish off the effect. Three seagulls are added giving the roof more interest. These are #85006 Sheepscott Scale Products.

I added the large pulley wheel which is laser cut wood. I stained and chalked it to resemble old wood. The chain added is 42 links per inch and is painted a rusty black colour.

The building has three floors to detail. I added as many details as I could cram inside each door opening. Most of the details are from Juneco but I also used some laser cut Bent chairs from Full Steam Ahead which look great. These were sample give aways at last years Fine Scale Model Railroader Expo. I also added the sample give away press from RailroadKits, also from last years Expo.

The packaging house is set on the Gatorfoam and the ties for the siding are already laid out.

The structure is mounted on Gatorfoam. I painted the base an earth colour then added mainly Woodland Scenics ground foam and Scenic Express weed tuffs. In some areas near the tracks I actually used some real cinders that I found some years ago in the Bellows Falls yard. The tracks are hand laid painted and weathered. I used crushed limestone screenings for the ballast. The stone steps are added at one end of the structure. The stone loading dock that should have been located at the double door loading area on the buildings side was moved to the far end for truck loading. To make the scene come alive I added a truck for loading and as many workers as I could squeeze in between the details. I still have to add the sign but that will come shorty once I get my laser printer operational.

White River Packaging is going to be a happening place now that it is finished...George

A look inside during a regular evening shift.
The back side of the structure is all windows.

Wednesday, 12 September 2012

WRJ Glory Days 2012


NECR 3857 is seen out front of the WRJ station the day before Glory Days. It would shortly depart to switch the NECR yard.  By the day of the festival it was found once again parked out front but with a small NB train.


20th Annual Glory Days
Sept 8, 2012
White River Junction, Vermont

This year I made a last minute decision to attend the 20th annual Glory Days. It was to have a interesting collection of locomotives including the Pan Am heritage B&M Geep. The railway equipment portion of the event was arranged by ERN, Eastern Railway News 20th Annual Glory Days of the Railroad Festival | Eastern Railroad News Online Magazine and was to include a night photo session which sealed the deal for me attending...I love doing night photos. I had only attended one Glory Days and that was the 6th Annual in 1998 so I really was looking forward to this day.

If one likes train rides a bonus for the day was a $10 train ride on the White River Flyer...a short 15 minutes out and 15 minutes back trip.

I arrived the day before, about noon, to get some photos of the equipment before the crowds arrived. I was not the only one with this idea as there was a good group of rail fans coming and going during the afternoon in WRJ. The engines in town included:

Montreal, Maine & Atlantic #8592
Green Mountain #405
Pan Am - B&M heritage Geep #77
Claremont Concord #104
NECR #3857
C&P #306
VTR #307
MEC #305
Amtrak Heritage unit #156 on the Vermonter

One of the highlights of the day was the arrival of the Vermonter with Amtrak Heritage unit #156 on the lead. The Pan Am heritage B&M geep #77 was posed in a position so one could get at nice shot of the engine, station and Vermonter in one photo. I found a spot that I took a similar type of photo back in 1996 (it was published in Railpace back in the day) about 45 minutes before the arrival of the Vermonter. Well a photo line started to assemble shortly after.

The Vermonter is departing WRJ with Amtrak Heritage engine #156 specially selected by Amtrak for the train through town this day. The photo line stretched from the edge of the track to the back yard fences of the homes nearest the tracks. A big gang got a great shot with a vintage B&M engine in the foreground.

Montreal, Maine & Atlantic #8592 spent the whole day on the Wye.
MMA  B39 8E, #8592 is tucked away on the Wye while a set of VTR power including GP40-2 #307  is seen tucked in the middle. Green Mountain RS-1 #405 can be seen on the White River Flyer near the station. I took this photo about 8am the day of the festival.

Night Photo Session
As the day portion of the festival ended the rain began, around 4- 5pm but became a light drizzle by 9pm. Unfortunately the organiser decided not to show up for the night photo session and was not answering his phone. It appears he had already done his own night photo session the night before. The engine man also could not contact the organiser and had put the equipment away in an undesirable spot for photos but good for lifting over the next day or two. He originally was to stay and stage the engines.

At 9pm there was at least a dozen guys standing around in the drizzle deciding what to do. With the night photo session lighting guy, Shaun McGinnis on site and most of the gang having flash unit and tripods it appeared no one was going home without a few night shots...so it became a kind of  free for all. There was small groups all over the place taking photos using whatever lighting they could muster up. The generator for the flood lighting ran out of fuel after the first round, although it was a very long one and I think everyone came away with a good group of photos of a trio of engines. At one point I was taking photos using one flash unit plus two sets of auto headlights...an interesting night that I don't think anyone could or ever wants to replicate again...George Dutka


Pan Am heritage B&M GP9 #77 during the night photo session lighted by Shaun McGinnis.
Shaun set up his lights so we could get a shot of the three units tucked back on the Wye. It was a hard shoot as we had to stand at times in waist high weeds and brush.
This photo I took using available lighting, a flash unit and headlights from two cars. You really have to get creative when there is no other options. I have never been to a night photo session like this before.

Monday, 10 September 2012

Historic Deerfield Village


New England Heritage Structures
at
Historic Deerfield Village


March 20, 2012


Back in March 2012 I spent a night in South Deerfield with the intentions of driving up to Millers Falls and East Deerfield the next morning. As I started out in the morning I realised I was only a few minutes away from Historic Old Deerfield Village. I decided to drive through and take a quick look around even though it was the off season. Well I was really impressed by the types and sizes of the buildings found. All the buildings have been saved and refurbished beginning in the early 1950s. Over 11 of these homes since then have become part of a working museum. There are plenty more in the town too with a lot of modelling inspiration to be found...check out their web site below...or visit...George Dutka

www.historic-deerfield.org/


A lot of modelling inspiration can be found in these homes.

There are many smaller structures that have been saved and moved to Old Deerfield


Saturday, 8 September 2012

20,000 Page Views

A Rutland Ry. milk train heads to Bellows Crossing diamond. The first car behind the engine is a B&M 4 door can milk car designated for the Brookside Creamery. The car is destined to the Co-op creamery by the Bellows Falls, Vermont station.
Milestone - 20,000 page views

In ten months of blogging the White River Division has had 20,000 page views or visitors checking in as of today. I just want to thank-you all for stopping by and hope you have been enjoying what I have to blog about. I try to balance my modeling project past and present, aspects of my layout and historical railway ramblings...onward...George.

Wednesday, 5 September 2012

Harvest Time - Pumpkin Patch

Central Vermont RS-3 passes behind a local pumpkin patch on the White River Division just outside of White River Junction, Vermont. The pumpkins are now ready for picking in this early fall scene.
Harvest Time
Creating a fall agricultural scenic effect
The Pumpkin Patch

One fall scene I really wanted to add to the White River Division since I model early fall was a Pumpkin Patch. I have crossed many such scenes along New England ROW's during my visits. I did take some photos so I had some idea how I might incorporate one on my layout.


My pumpkin patch scene took longer to plan than construct due to the fact I could not find a ready supply of HO scale pumpkins. I began by building the barn and adjoining sloped field which remained crop less till I could locate or scratch build pumpkins.

The pumpkins are by Master Creations #20702 and sold by BTS. Each package has six pumpkins made of white cast metal in two sizes. They also have O scale pumpkins if that is your scale.


The pumpkin patch is set on a bit of a hilly rise which is actually how they are best grown.

I purchased 15 packages of pumpkins. Around 100 pumpkins are used to fill my 7 by 8 inch field. Before planting, the pumpkins are spray painted Floquil reefer orange and the stems are dabbed with dark green on some and rail brown on others.  I just randomly place the pumpkins around the field. The vines are made from the very fine ends found on golden rod weeds harvested during the winter months when totally dried. The vines I just scattered around the scene and attach with diluted white glue.

Take a close look at Don Janes patch below, he also added some ground foam and green weeds between his pumpkins. He did not use as many pumpkins as I did but he did get the same effect. The green weeds Don added brings additional realism to the scene...I just might add that to my patch. I did add some ground foam on mine but the colour is closer to the vine colours. A white wooden fence distinguishes the end of the pumpkin field near the face board of my layout.

This particular scene grabs the most attention by visitors and a load of questions. More than I ever anticipated...I am really glad I found my pumpkins and added the scene to the White River Division...George Dutka

Inspired by my pumpkin patch, Don Janes ordered a few packages of pumpkins for himself. He has since built his own patch just outside of White River Junction on his Green Mountain Division. Don Janes photo.

Monday, 3 September 2012

Harvest Time - Apple Orchard


The tail end of a Central Vermont Ry. freight passes an apple orchard on the White River Division. The apples are ready for picking and a local farmer is hard at work making sure none are wasted. This scene is located very near to the Northfield Falls, Vt. covered bridge.

Harvest Time 
Creating a fall agricultural scenic effect
the apples are ready for picking

Well as we are now into September and the apples are ready earlier than usual this year lets look at harvests that are taking place on the White River Division. This short article I wrote back in 2009 with the thought of it being used in some sort of publication. Instead I have decided to add it to my blog. Here we have  the first of two posts covering Harvest Time.

On the White River Division the towns are small and the countryside is large. My original design thoughts included adding as many farm scenes as possible. I have two farm scenes that regularly get a lot of attention and questions by visitors.  The first is my apple orchard, a typical scene I have seen while travelling through Vermont during my fall visits.

Modelling an apple orchard is a very simple project thanks to the products available from Woodland Secnics. My apple orchard is located at Northfield Falls, Vermont. At this location a farm scene exists including a scratch built barn and a farmhouse kit (Sylvan Scale Models) providing a perfect location for the apple orchard out back. The actual area I used for the orchard is 10 by 12 inches. I decided on 5 trees to be placed at the rear of the farmhouse and along the ROW. This sort of scene adds greatly to the visual effect of trains passing in the foreground.

The apple pickers have their hands full if they want to get the crop picked before they all land on the ground. Two tall ladder help with their job.
The orchard's base is a layer of ground goop covered with fine green ground foam. To make the trees I begin with the trunks which are small garden shrub branches that I trimmed to shape. The trunk is covered with sheet foliage (Woodland Scenics medium green F52) which I pull over the trunk till it looks like a tree. I made mine as round and full as possible and also brought the foliage close to the ground. Once all five trees are done I sprayed a light coat of Floquil green (or you could use Dulcote) and immediately sprinkle the apples on as one rotates the trees. The wet paint holds the apples on. I had to be careful spraying the trees...too much spray can discolour the apples being applied. For the apples I use Woodland Scenics fruits and flowers package T47. There are plenty of apples in each package leaving me more for future trees and to sprinkle around the base of the trees emulating fallen apples. These fallen apples are held down with a light spray of diluted glue. I also added a few crates of loaded apples made by Juneco suggesting harvest is well on the way. Tall ladders are also set near the trees.
If you look closely you can find  a full skid of apple crates ready for shipment plus a few part full crates scattered around the orchard.
To speed up the process one can purchase ready built apple trees and just plant them in an orchard setting. I believe Woodland Scenics now make some.

It has been a number of years since I finished the orchard and the trees still look good. I know over time the foliage will begin to dull. I plan on solving this problem by just re-spraying the trees with a light coat of green paint and apply more apples. The apples that would be painted would just blend in and would be apples still not totally ripe.

If you are interested in seeing a S scale apple orchard take a look at a recent post by Trevor Marshall, Back orchard planting on his Port Rowan in S scale blog...well I think it might be time to make an apple pie...George Dutka

Wednesday, 29 August 2012

Blog Photos

For the last few months when I had a moment I played around with the photo settings and sizes to see what I can do to add more photos to my blog. It appears by posting them one size smaller...I normally post at extra large...the file sizes are cut in half. I also have been downsizing the files to 590 pixels as it appears that files under 600 pixels do not effect my blog storage capacity. By rearranging some of my past post photo sizes plus keeping the files smaller, I should be able to squeeze another year out of this blog...George Dutka

Tuesday, 28 August 2012

MEC 40 foot Boxcars

 
MEC 4250 is an Atlas model that needed minimal changes. The boxcar to the left is my Train Miniatures conversion that I built decades ago.

A trio of MEC steam era boxcars

Over the years I have accumulated a small fleet of MEC boxcars. Three date back to the steam era. The Atlas model seen above is my most recent being added to the fleet in 2010. The other two are a Yankee Clipper model and a Train Miniatures conversion.


My first MEC boxcar was #5684 which began as a x-29 Train Miniatures model.

MEC 5684
This boxcar was built using Kyle Williams MEC ARA boxcar model article found in Febuary 1986, RMC. I believe the RMC model is still running on the Rensselaer NEB&W layout. I began the project with a Train Miniature x-29 model. I stripped off the roof walks, grabs, stirrups, and ladders. the door and sliders are redone also. I do not recall all the changes since this was about 1990 when I did the project. The lettering is Walthers and the paint was Floquil boxcar red. I used the trucks included with the kit but added Kadee couplers. Wire grabs, and stirrups are added along with new ladders. I believe I used an Athearn door.


MEC 4609 is a Yankee Clipper kit built by my friend Warren Dodgson back in the 1990s and was added to my collection about 10 years ago. The only change was the adding of some weathering.

MEC 4609
When my friend Warren Dodgson was getting out of model railroading about 10 years ago I had the opportunity to acquire his MEC Yankee Clipper kit. He really did a great job on it. All I needed to do was give the car a light over spray of Floquil boxcar red and add some very light chalk weathering.


The MEC trio are seen together on my workbench. You will note that all three are carrying different style logos. The Atlas model has a rectangular herald as first introduced about 1930, the Yankee Clipper a more modern round herald and the T-M has Maine Central spelled out as would have been seen on the cars when first built.
 MEC 4250
My most recent MEC boxcar is a ready to run model produced by Atlas. This is a very nice model that runs great right out of the box. The only change was adding Kadee #58 true scale couplers as the ones supplied by Atlas look over scale. I over sprayed the model with Floquil boxcar red then added a little chalk weathering while the paint was still tacky.

These three boxcars are among my favourites rolling along the White River Division...George Dutka

Monday, 27 August 2012

Crosby Coal in O scale

I was looking through the current Walthers flyer when I came across a Branchline Trains listing for a O scale version of Crosby Coal. I have seen the N scale version but did not know they also made it in larger scales. It is  numbered 181-494 and currently on sale. I think this would make a great building for modellers in O scale...George Dutka

Saturday, 25 August 2012

Barns of the Midwest blog

If you are interested in barns and interesting angles that one can photograph barns you might want to check out Ernest J. Schweit blog. Ernest is a photographer who has a good eye for details and spends his time photographing barns in the Midwest. His views may inspire you to model such a scene along your right of way...his link is below...George Dutka

Barns of the midwest

Saturday, 18 August 2012

CV outside brace boxcar - Part 2

A Walthers 40 foot outside brace boxcar which I have upgraded to reflect the looks of the CV prototype.

 Another CV 40' outside braced boxcars
Upgrading a Train Miniatures or Walthers model

One of the aspects of this hobby that I enjoy is the challenge of converting a piece of equipment that may or may not resemble a prototype properly and change it into something that reflects the feel of that prototype. It does not have to be exact but a good stand in. One such model that works well for a Central Vermont boxcar is the Walthers or Train Miniatures outside braced wooden end car. These cars can be picked up for a song at train shows and the conversion can be completed with minimal part costs.

Before I get started with my model I would like to point out that in this post I have also added the nice looking CV model that Jack Kelly built using a CV lettered Accurail boxcar model and my CVRHS Ambassador article...also included in a past post. Jack sent me his nice photograph seen near the bottom of this post. There also is a prototype photo I took back in the 1980's of a CV outside braced boxcar used as storage near the CV St. Albans,Vermont yard.

The project begins with the ladders on the sides plus grabs and stirrups being scraped off. I removed the bottom door hardware and the brake wheel plus housing. I also removed the roof walk and built a new one using 2x8 styrene strips. I did reuse the end platforms. The platforms got Tichy corner grabs added.

The door on the car looked good but the cross bracing needed to be closer to the top of the car. So I just turned the door around. A new latch was added to the sides. With the ladders removed I used a Tichy jig to line up and drill the holes for the wire grabs. I used Tichy grabs on this model.

Styrene pieces are used to construct the end cowls and end supports. I also built up a new roof walk. The grabs are from Tichy.
On the car ends if you look closely you will note the boards run up and down and not across as on the prototype. This was left as is. I felt by the time I added the end bracing made from styrene 2x4 and the styrene cowl you would not really notice it that much. If you wish you could strip the ends smooth and add new thin styrene sheathing, The cowl is 10 inches at the ends with a 30 inch by 6 inch centre section. 

I used Kadee true scale # 58 couplers and pockets, and a Kadee brake wheel and housing. New stirrups came from my parts box. Operating levers are bent from wire along with a bleed rod. A piece of wire and chain are also added to the brake piston. The original trucks are used but at some point steel wheels will be added.

I use all Floquil paints and began by a coat of grimy black on the under body and couplers. The car body got a coat of boxcar red. The decals I used are Champ Decals - CV boxcar HB-361 if you can still find any.  The car got an overspray of flat finish and boxcar red followed by some chalk weathering...another nice piece to add to my fleet at a really low cost...George

The boxcar door was removed and turned upside down so the cross brace is near the top, The door bottom hardware was removed since it was very bulky looking.


Jack Kelly's  model using a CV lettered Accurail model and my instructions found in the CVRHS Ambassador or in a recent blog post. Jack painted out the CV noodle to back date the model. He also touched up the carved off details and added grabs with Floquil boxcar red which was a great match.

CV 40035 in St. Albans used as storage during April 1988, George Dutka photo


Friday, 17 August 2012

B&M Buskirk, NY Station


The ex-B&M Buskirk, NY station as it looked in March 2012 from the roadway.
A B&M Station as it looks today
Buskirk, NY
During my March 2012 road trip through New England I stopped at a few locations along the B&M West End. I was on my way to the tracks at East Buskirk to see what still remains when I came across the old Buskirk station. The tracks that once passed by this station was the Eastbound B&M main line. The Westbound main is located about a mile down the road. A smaller shelter was located there called East Buskirk. It is no longer standing. The two stations were manned by the same operator stationed in Buskirk.

The B&M at one time had a double track section from Eagle Bridge to Johnsonville, NY of about 7 miles or so.  The track spacing was so far apart that the northern main was actually .9 miles longer than the southern main in a seven mile stretch. East Buskirk and Buskirk  are located at a wide spot in the double trackage. When the B&M single tracked the area the longer section was abandoned and the station at Buskirk was eliminated.

When I stopped to take a photo of the station as it looks today the owner was outside doing some early spring cleaning. It was an extremely warm week for March. I though I would ask her a little about the structure. She told me the building came up for sale over 10 years ago, around 2000. It still was all original at that time and in need of a lot of work. She and her husband decided to purchase the station and turn it into a home. At first all their family though it was a crazy idea but it all worked out. She mentioned that it was quite small inside but I noticed a large garage about the same size as the station or possibly a little larger for overflow home goods. The space is just enough for the two of them as they only live in the station during the good weather and head to Florida for the winter months. She asked if I would like to see some photos of how the station once looked and also as it did when they purchased it. They are great photos which I took photos of as seen in this post..George Dutka


A undated photo of the Buskirk station from the Joseph A Smith collection
 
The current owner of Buskirk station holds up an old photo she has of the station as it once looks when in use by the B&M. It has not changed much even with renovations into a home.


The Buskirk station as it looked when the owners purchase it around 2000. From the station owners collection.


Sunday, 12 August 2012

TrainLife

A couple of weeks ago I discovered a link through one of the Yahoo groups I follow regarding old modelling articles. It appears there is a site that gives one access to out of print railfan and model railway magazines.  Early issues of magazines such as Rail Model Journal, Model Railroading, Prototype Modeler plus some railfan monthlies are included. Some magazines are the complete series. These nice oldies can be found at the link below...George Dutka

TrainLife

Thursday, 9 August 2012

A Camp along the White River Division


The tail end of a Central Vermont freight enters the yard at White River Junction just above a camp located along the rivers edge. The WRJ yard limit sign can be seen near the camp.

Modelling a Camp Scene
Just outside of White River Junction on my White River Division layout is a camp scene that is along the shore of the causeway. This scene is built almost inside the WRJ town, but is blocked out by a forest of trees.

This type of scene can be found in many locations in Vermont especially along rivers, ponds and lakes. I have also found good examples along some railway ROW's. In New England and in particular Vermont the local population seem to refer to their lake or pond retreats as camps...in Ontario we just call them cottages or cabins...but what ever you wish to call one I wanted to include such a scene on my layout. The space needed to model a camp is very minimal at best and the structures are very small.

My main structure is the add-on building that was included with a Sylvan Scale Models wooden home kit. I just made a new roof and repainted the walls. The garage is a kitbash of card stock, wood, and parts from an AHM farmhouse garage. Most of the camp residents are Woodland Scenics including the car. The canoes are resin Sylvan Scale Models. I added a little beach sand, limestone road and yard details to complete my scene. I even added a boat trailer in the garage to fill it up a little.

If I were to add another camp I would build it as a cluster of  small cabins in various forms plus a few outbuildings in just a little bit bigger area...George Dutka

Looking into the scene from the layouts edge one can see a CV Geep peeking out from a grouping of trees that somewhat separate the two scenes.


In the foreground one can see my two resin canoes along the sandy shore which also includes a good dose of stone and rocks. Most of the figures are Woodland Scenics.

Sunday, 5 August 2012

Dave Frary update- Building an Expo module

Dave Frary has posted the final two video's, or parts three and four which I found very interesting and informative. I hope he has this module on display at this years Fine Scale Model Railroad EXPO. One can view all four videos at the link below...cheers...George Dutka

The 2012 Fine Scale Model Railroader EXPO